What is Google Ads?
In case you don’t know what is Google Ads, pay close attention to this part of the article. Because only then you can understand why you need a Google Ads account.
Google Ads is here to help your business. As it says in the name, it is an advertising program from Google which you can use to promote what you do, what you create, and/or what you sell. You can promote almost everything as long as it complies with Google’s policies.
You can choose how much you spend on them every day or week. You can spend as little as a few tens of euros per month or thousands of euros each month on various campaigns. This is entirely on you, although Google may favor those who spend a little more on their campaigns. 5 euro per day is considered enough by Google. However, it heavily depends on what you are selling.
After deciding how much money will you put into the campaign you can show your ads to various people in various places. Those places are:
- Google Search – directly in the Google search engine and on the result page on the top and on the bottom
- Google Display – a group of websites where ads made in Google Ads appear
- Gmail – ads shown in the Gmail interface
- YouTube – ads in a form of video directly in the YouTube streaming service or in a form of pictures and/or text
Thanks to targeting you can somewhat control who sees your ads. You can choose location, address, gender, interests, and time where your ad shows up. This can help you with bringing more relevant traffic to your website.
Setting up Google accounts
1. How to create Google Ads account
Google Ads is a system for online advertising of products and services on Google. Before you start, you need to have Gmail account. If you don’t, just register here.
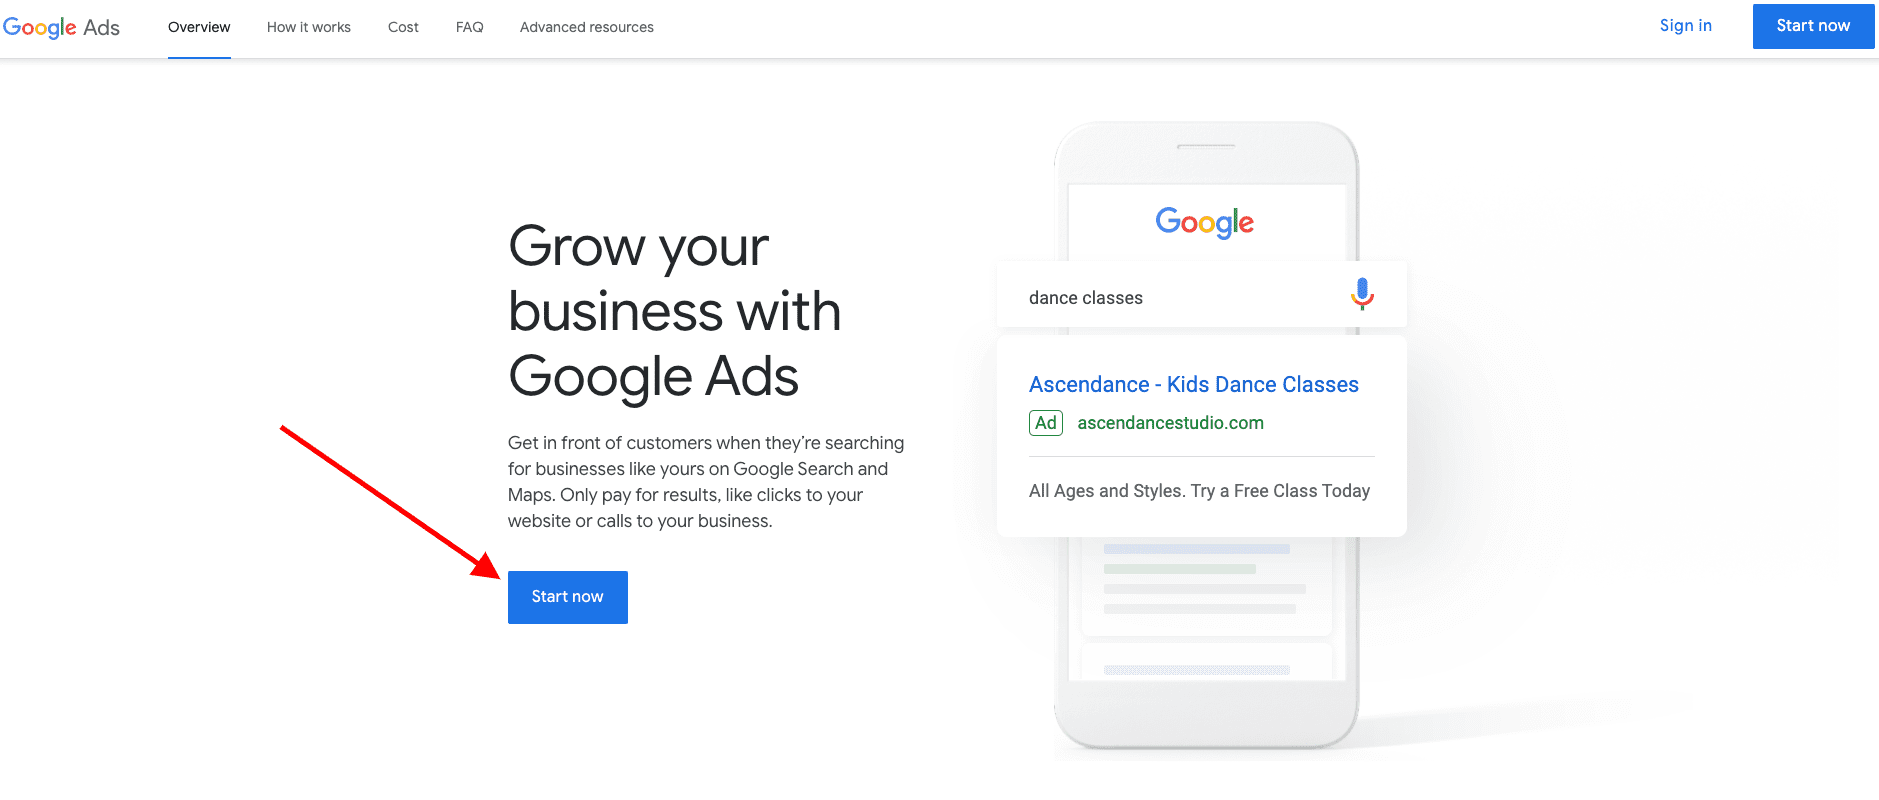
1. On the Google Ads page, click the blue “Start now” button.

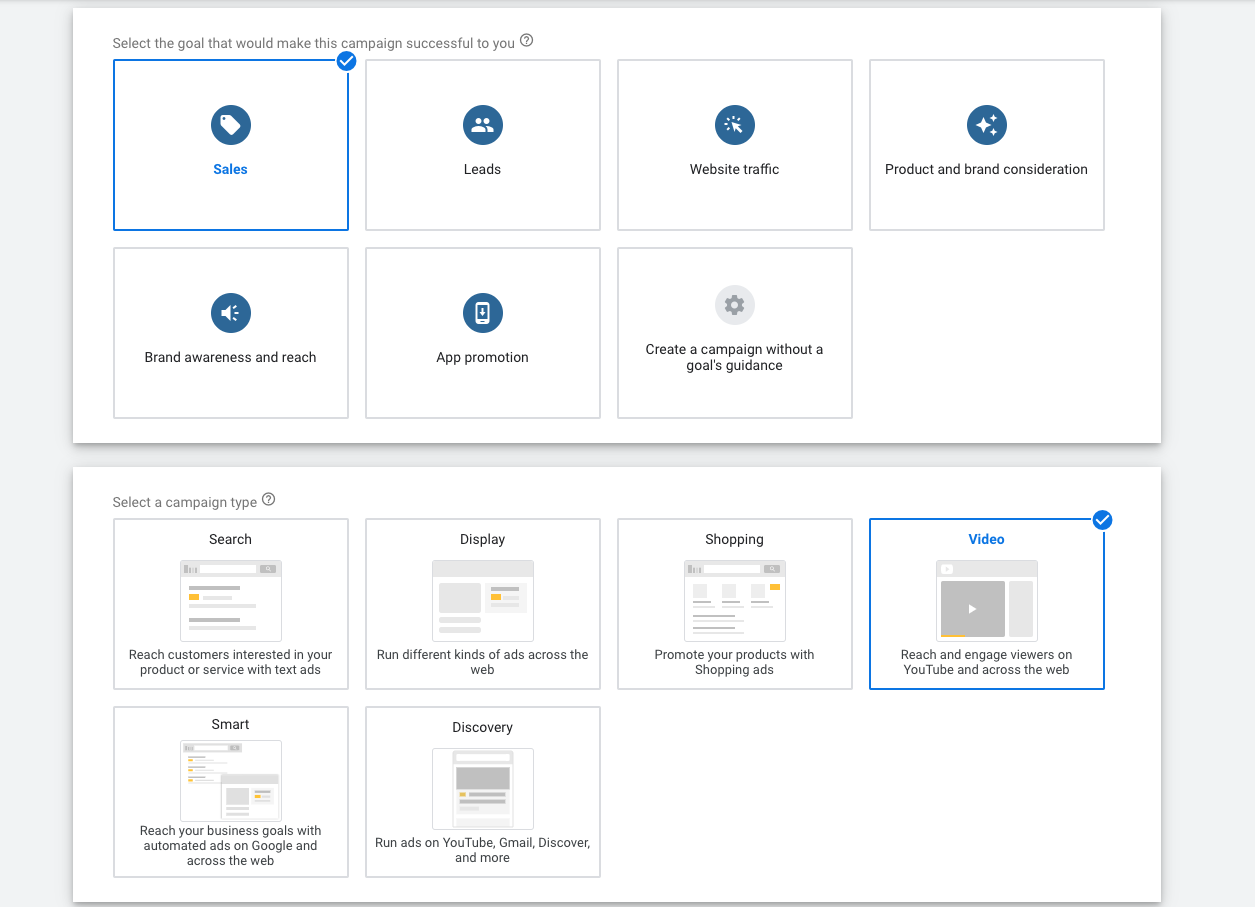
2. Now you can choose one of the options based on your Goals. This depends on the type of your business. If you are an e-shop owner, we recommend you to choose the “Get more website sales or sign-ups”. If you are a professional marketer and you already created multiple Google Ads accounts, you can click on the “Switch to Expert Mode”.


3. In the next step, Google will ask questions about your store. Choose the option that fits you best. Click on the “Next” button.


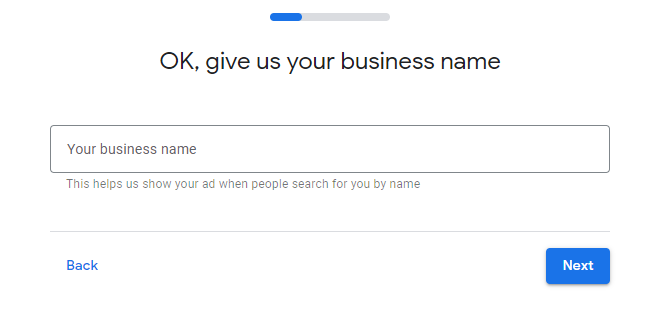
4. In the next step, you need to choose your business name. Take this step seriously because this can help you to show your ads when someone searches for you by your business name. Click on the “Next” button.

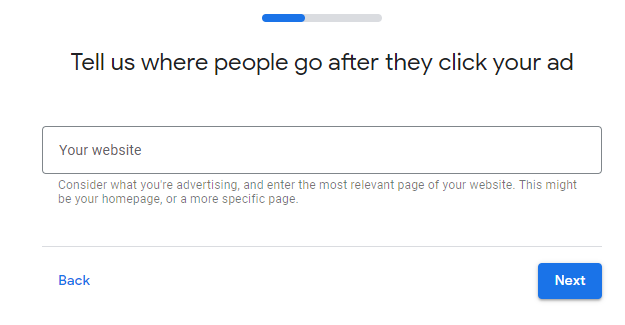
5. Now it is the time to insert your website. If you do not have one, you need to create it. These days, you can’t do almost anything without a website. Click on the “Next” button.

6. After the last step Google will scan your website and create a preview where your ads will lead people. Click on the “Next” button.
7. Google will now ask about your Google Analytics. You can skip this step because we will look at that later in this article. Click on the “Skip for now” button.


8. Google will now ask about your Google Analytics. You can skip this step because we will look at that later in this article. Click on the “Skip for now” button.
9. In this step you can create your first ad. It is up to you how you will set it up. Click on the “Skip for now” button.
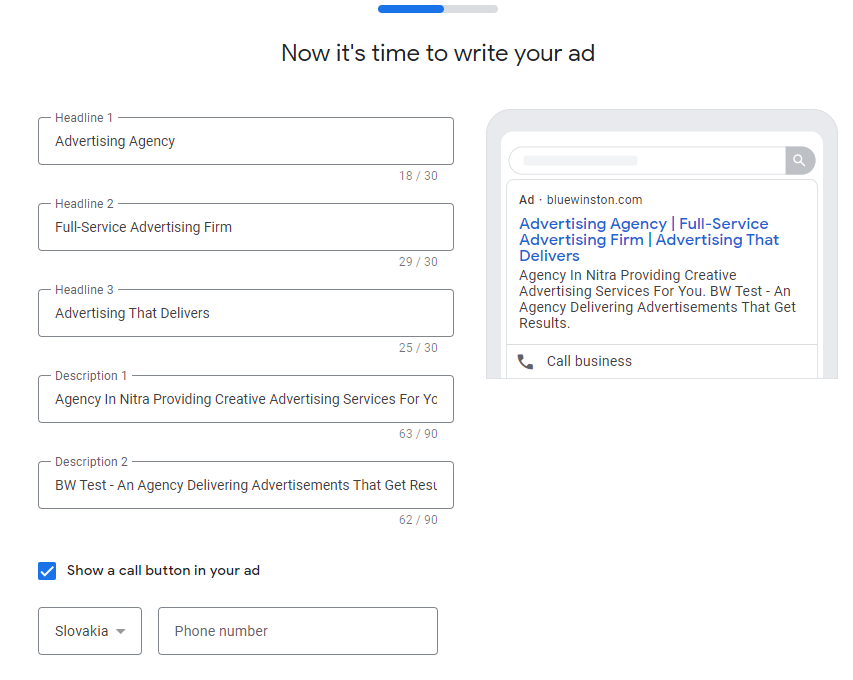

10. Now you can add keywords that fit your business. Do not be afraid to try many of them. But for now, you can choose a few. Click on the “Next” button.


11. Your ads need to be targeted to some areas. In this step you can choose what area you want to target. Choose your area and click on the “Next” button.


12. In this step you can choose your budget. You need to think about how much you can invest. There is also an option where you can create your custom budget. In the last part you need to select the duration. After you are done, click on the “Next” button.


13. Now you can review your campaign and if you find something wrong, you can edit it. After you are done, click on the “Next” button.
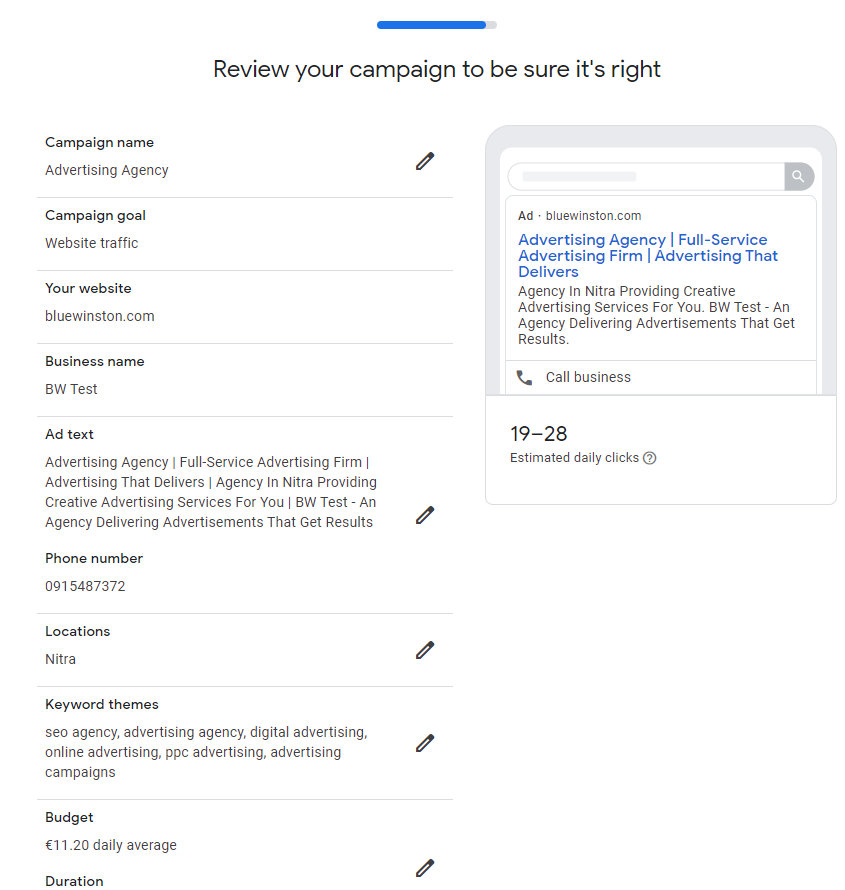

14. The last step is to finish your billing information and confirm the payment.
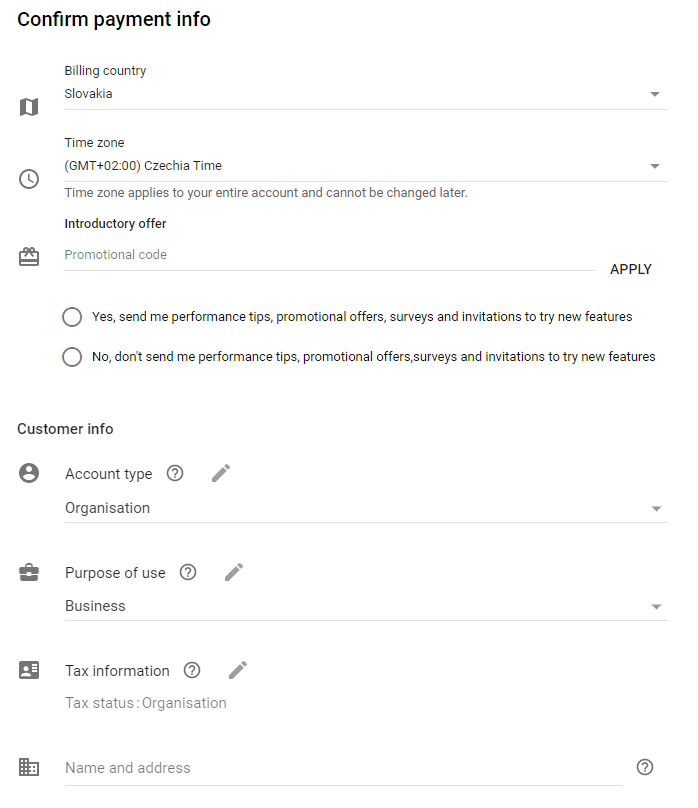

If you want to start using BlueWinston we recommend you to get back to the first step and click on the option “Switch to Expert Mode”. You can set up your account later.
After you done with the creation of your new Google Ads account, it’s time for Google Analytics.
2. How to setup the payments in Google Ads account
The payment methods available for your account will depend on your country and currency. Without proper billing options, you can’t use all the benefits that Google Ads offers. In this guide, we will show you how to set them up.
1. Log in to your Google Ads account.
2. Click the tool icon, then click on the “Billing settings“.


3. Now you need to choose Payments Setup like Billing Country and Currency.


4. In the next step, you need to fill additional information like payment method, automatic or manual payments, etc.
3. How to create Google Analytics account and where to find Tracking ID
Google Analytics is a free website analytics service offered by Google that gives you insights into how users find and use your website.
1. You can sign in to Google Analytics with your Google (Gmail) account or create a new one with a different email address. Keep in mind that it should match the one you used in Google Ads.
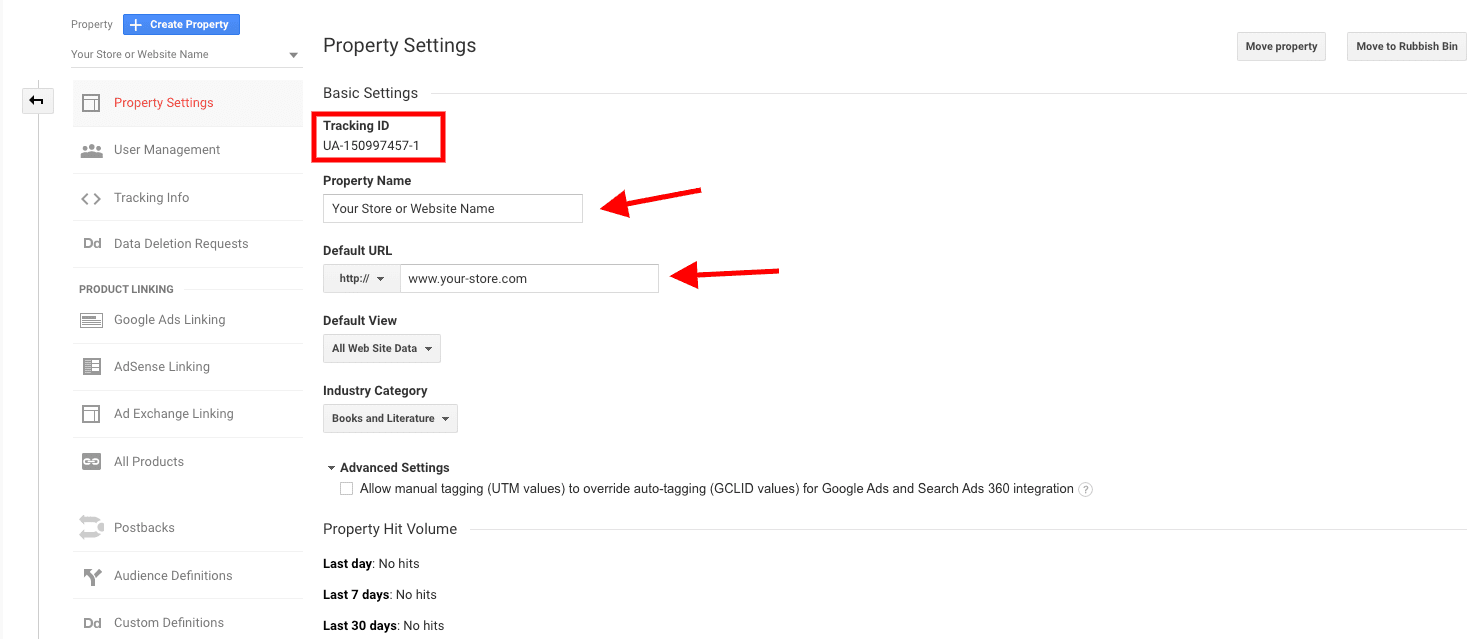
2. Once you create your account, you’ll need to set up property first. This means adding a web address where you offer your services or products. You will do this in the “Admin” section.


3. To view your settings, you need to click on “Property Settings“.


4. Once you in the settings, fill all the required information like “Property name” and “url“. Based on your property, you get your tracking ID that is specific to each site. This code is then required to be added to your website to collect data to create reports from. You can find detailed instructions on how to do this directly in Analytics Help.

5. Another basic step before you start using the service is to set up reporting views. Views allow you to create exactly the reports you need. You can set many of them as you want to and customize them to show specific data relevant for you. One such setting is, for example, filtering your IP address to avoid it in statistics. We suppose you don’t want your activity to be included in the overall report.


Like Google Ads, you can share your Google Analytics account with others without giving you’re your password. You can also find user management in the “Admin” section. You invite them via email addresses and manage their account competences.
Google Analytics is also an app, that you can download to keep your reports under thumb. You can also be informed about the activity via email. Just set your own alerts in the “Admin” section.
For advanced Google Analytics settings (especially report views), we’ve created a short guide to all the features you can use in the service:
- Get all the data in real time
- Get to know your visitors
- Find out where they come from your site
- Observe how they behave on your site
- Measure the effectiveness of your ads
4. Google Analytics transaction pixel for your website (ecommerce tracking) + Global Site Tag
After we showed you, where to find your tracking ID, it’s time to show you where you will find Global Site tag.
1. Open your Google Analytics account.
2. On the left menu, click on “Admin“.
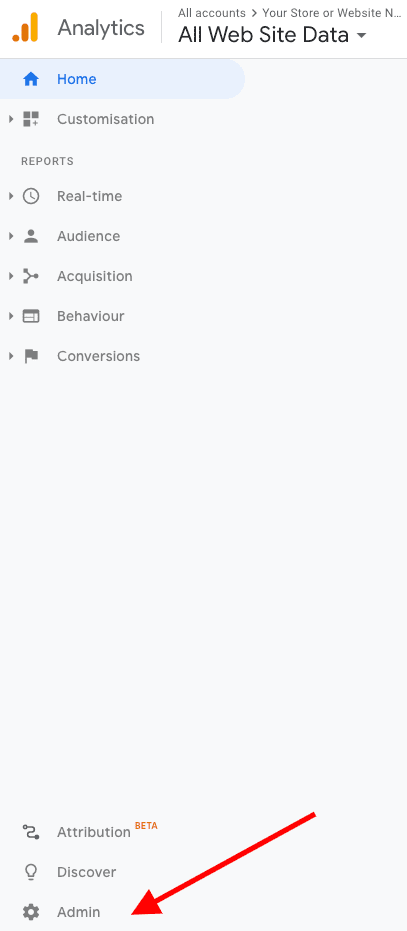

3. Once you are in the menu, find and click on “Property Settings”. Keep in mind that you can always create new account for your new or other website. Now, we are going straight to the point.


4. In the “Property Settings” look at your left side. You will see “Tracking Info“. Select it then click on “Tracking Code“.
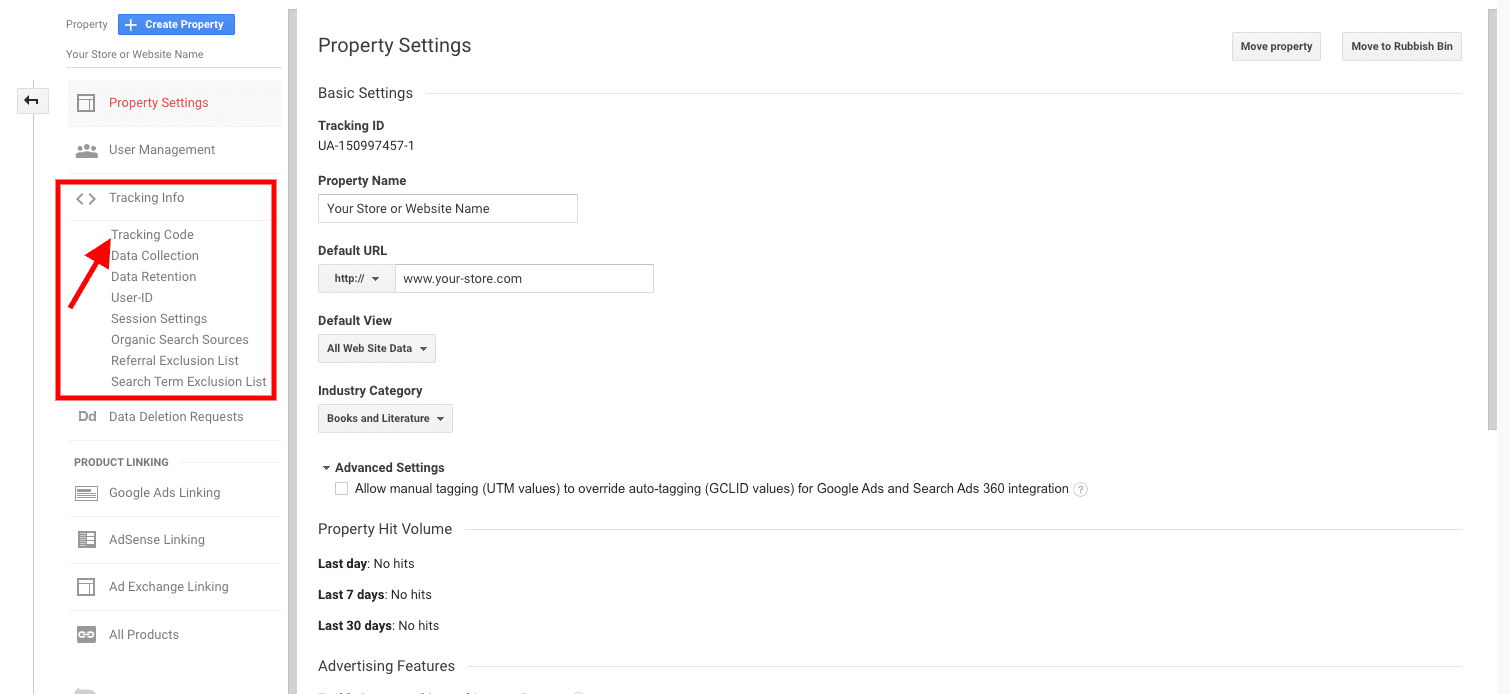

5. This is where you will find your own, personal Global Site tag.


6. This is the Global Site Tag (gtag.js) tracking code for this property. Copy and paste this code as the first item into the of every web page that you want to track. If you already have a Global Site Tag on your page, simply add the config line from the snippet below to your existing Global Site Tag.
5. How to link Google Ads and Google Analytics accounts
You only need a few clicks to link the created Google accounts and they will take care of the statistics for you. We will show you how to do that.
1. Log in to your Google Ads account.
2. Click on the “Tools” section, then find “Linked Accounts“.


3. Once you clicked on the “Linked Accounts” find Google Analytics and click on “Details“.
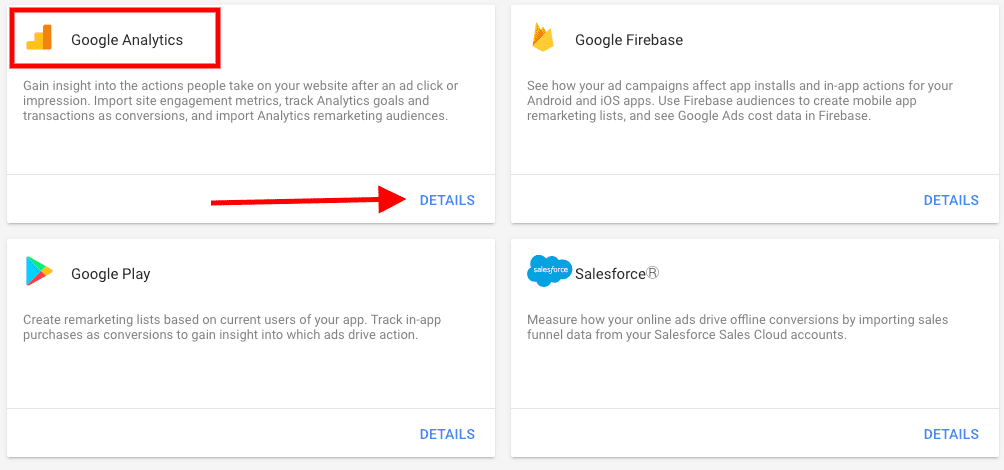

4. In this part, you can see all of your stores. By clicking on “link” button you will link them.


6. How to create Google Merchant account
Once you have created accounts in Google Ads and Google Analytics, you need to organize the products you offer in your e-shop somehow. Here, the Google Merchant Center offers a helping hand by collecting product data that you will then advertise.
Keep in mind that you need to have SSL certificate (https://) on your e-shops, websites to run Merchant Account and Shopping Ads.
1. Sign in to the Google Merchant Account. Next thing you need to do is to fill all the information.
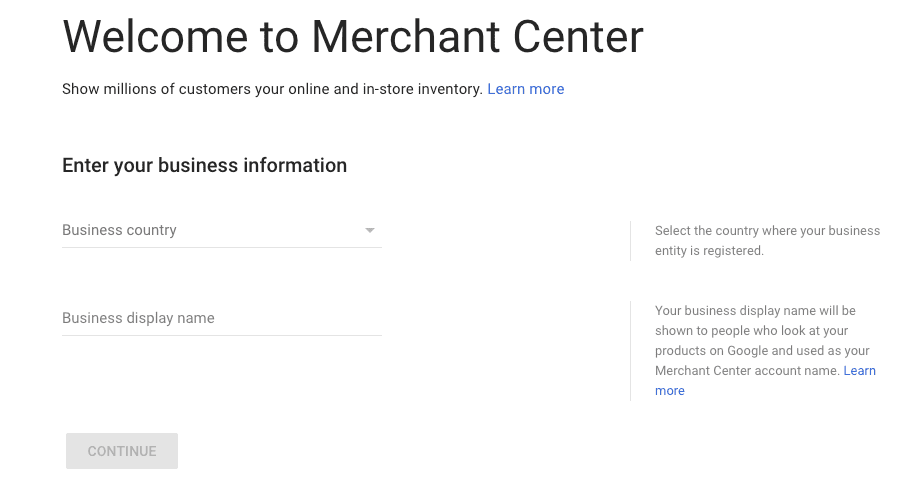

2. Accept Terms and Conditions then click on “Continue“.
3. Choose the programs that fit your objectives. If you can’t decide, choose “Skip for now“.


4. In this step, you can see the review of your summary. Please don’t forget to check if your business complies with Google Merchant Guidelines. After that, click on “Create account“.
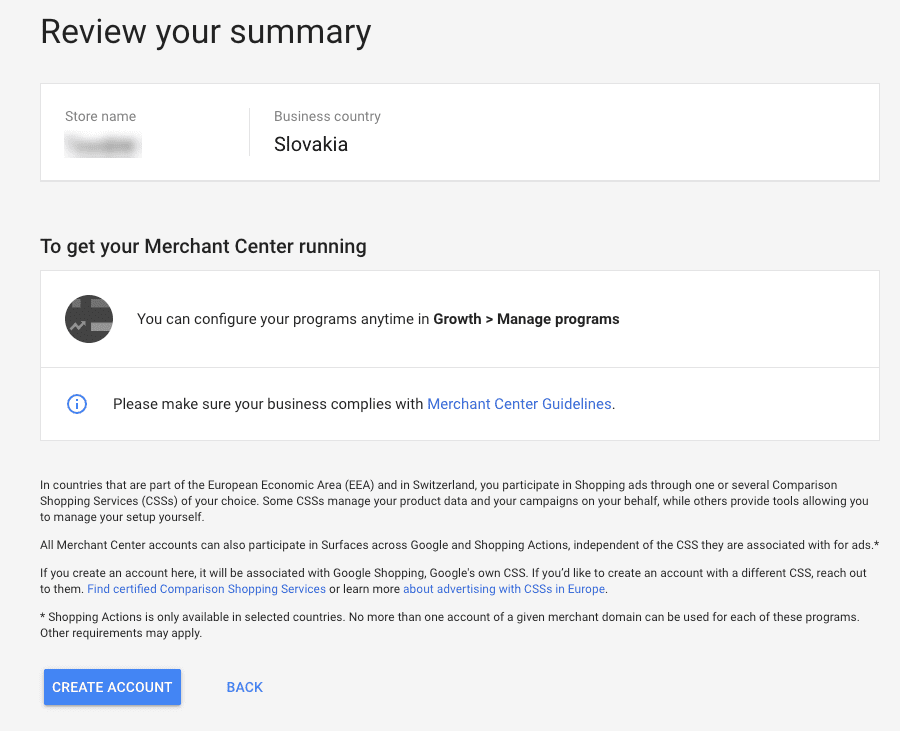

5. You will then be taken to your account where you have your own Merchant ID. In the “Business information” section of the menu, complete the required information about your business. In addition to classic data, you can also upload a logo or colors that represent your business and can be used for advertising.


6. In order to upload information about your products, you must have a verified e-shop web address. In this way, Google verifies whether you are the actual owner of the address. To learn how to verify your web address and what to do if you own more addresses, see this link.
The advantage of using BlueWinston with Google Merchant Center
BlueWinston brings you an unique opportunity to transform your common XML product data feed that you are using for creation of ads, price comparisons or Facebook, for the purposes of Google Merchant feed. These products and information will be automatically updated each 6 hours.
In addition to “storing” products, the Google Merchant Center also offers a helping hand to improve your advertising results. In the “Opportunities” tab in the left menu, you’ll find recommendations on how to change your product or campaign data to make your ads more effective.
7. How to link Google Merchant and Google Ads accounts
The Google Merchant Center collects information about the products you offer in your e-shop. You can then use this data to create advertising, especially remarketing campaigns. Therefore, you need to link it with Google Ads.
To link your accounts, you need to use a single Google (Gmail) account for both your services accounts.
1. Log in to your Google Merchant Center account.
2. In the settings menu, click on “Linked accounts“.


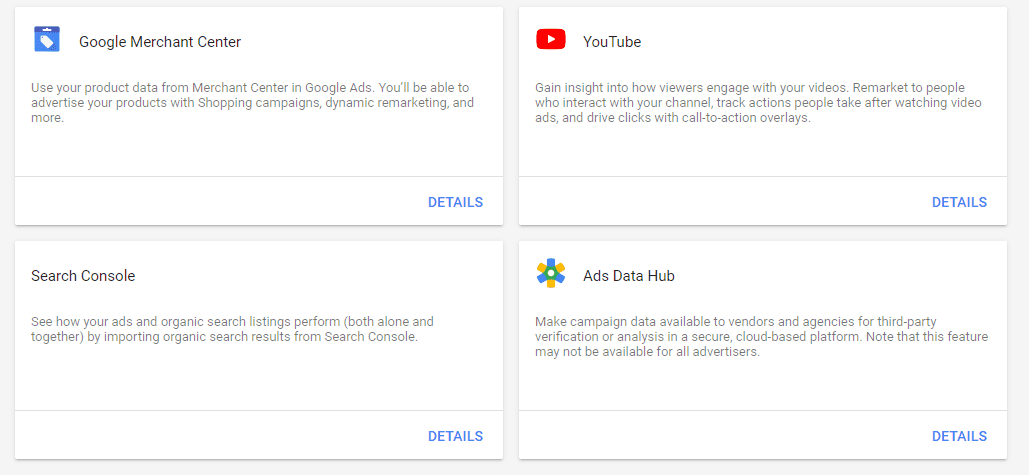
3. Now you can see your Google Ads ID. Simply click on the “Link” button to link these accounts.


4. Your request has been sent. Now log in to your Google Ads account and simply accept this request. You will do that by clicking at the “Tools & Settings > Linked accounts” then scroll down and click on the Google Merchant Center account – Details. After that you will find this request and you simply accept it.

If you prefer to see this guide in video version, check out our YouTube video.
Advertising on Google Ads
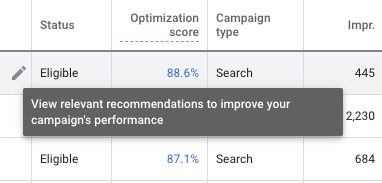
Creating an ad is not enough to be in the spotlight. You may ask why. The answer is quality. Google wants only the “creme de la creme” on their pages so they favor advertisers who provide the best ads possible. The simplest way to check for the quality of your ads is the “Optimization score” column in Google Ads.
TIP: You can achieve a better optimization score with better copywriting, more relevant information in your ads, simple landing pages, or fast website.
May it be:
- ROAS
- the total number of conversions
any other metric that is important to you
By setting up reachable goals you get one step closer to becoming an even better advertiser.
If you did achieve your goal, you can set another and if you didn’t, you have to figure out what is not working for you – may it be budget, texts in your ads, or your website.
Deciding who is the right audience for you might be a tricky task. First, you have to be completely sure what you are selling, why you are selling it, and to whom you are selling it.
Keywords list can help you very much. Looking for the right keywords is vital for amazing campaigns. Google Keyword Planner can is one of many tools that can provide you new keywords or perfect your existing ones. You are able to find it right in the Google Ads interface and can use it according to your needs.
When creating campaigns, you have to set up a budget. Setting up way too little may result in a campaign that performs very poorly. So be sure to give it approximately 5€/day. But be careful! Even though you set up the budget for a day, it can exceed it over three times. So be careful because from 5€ a day may be 15€ a day. Rules can save you some trouble when set up right.
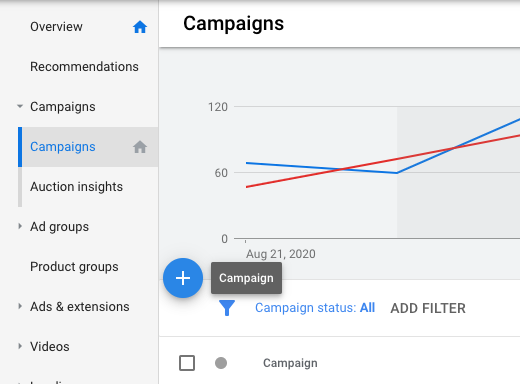
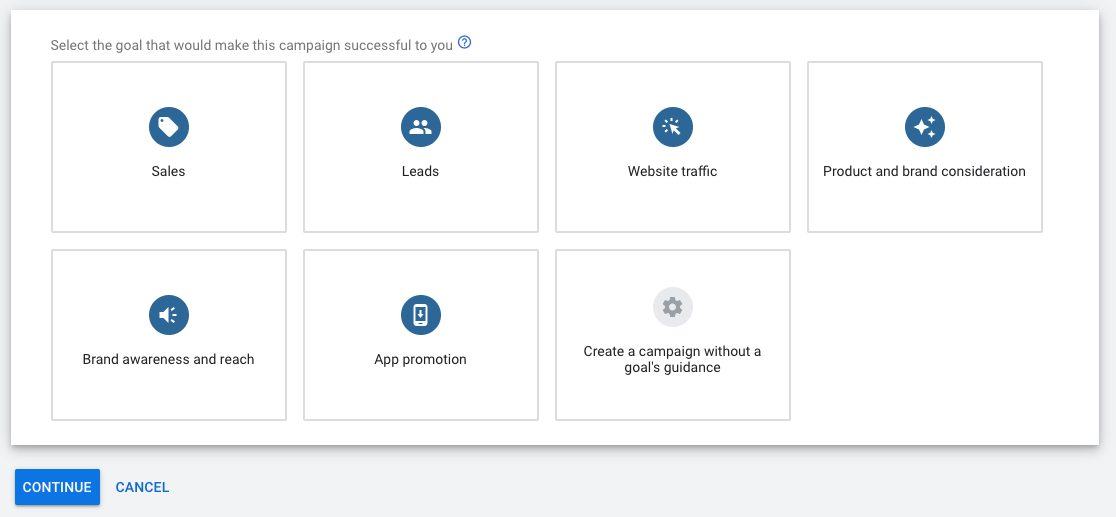
Now, for the fun thing. Ads creation. Google is very helpful in this stage and offers you various tips on how to make the best ad for you. You start by clicking the white “+” symbol in a blue circle in the “Campaign” tab and continue by setting up goals, budgets, creating texts, and adding extensions.
To understand your campaign and to make sure it is efficient, you want to set up conversions tracking as well. You can do it in Google Analytics or Google Tag Manager. These two Google tools are here to help you with your ads.
This may be challenging for you if you do not have any experience with that, but there are a lot of guides that can help you. You can even ask some to help you. The “Conversions” option can be found in “Tools & Settings” under “Measurement”.
If you are thinking about a way to target people who have already shown some interest in your web page or mobile app, there is a way. It is called remarketing. With this little marketing helper, you can gain even more customers.
If done right, it can persuade a user to come back and make a conversion and it is reminding those who have visited your website, put something in the basket, or anything else.
Advertising on Youtube
First, you must have a YouTube channel. Your own personal account is not enough in this case so when you log in to your Gmail account, you have to create a channel as well. It is very easy and can be done in a few minutes.
Then, you need to connect your Google Ads with your YouTube channel. In your Google Ads account, click on “Tools & Settings” and under “Setup” is “Linked accounts”. Click on it and add it by inserting the name of your channel or its URL address.
When creating content for your video ad, be sure to make it entertaining to watch, interesting, and that it says what you want it to say. Also, don’t forget about high video and sound quality and the length of the ad. Very long ads are becoming boring after a longer period of time and after 5 seconds, users can easily skip them.
Tracking your success
When checking the performance of your campaigns, Google Ads provide multiple KPIs to help you evaluate their success. You can add another KPIs by clicking on a “Columns” picture right above the result table.
If you have Google Analytics connected to your Google Ads account, you can check the performance there as well. Google Analytics provides a more complex analysis of the people visiting your webpage. You can see where they lose interest, where they stop using your page, how they behave, and many others that can tell you all about your visitors.
Optimization score is something that tells you how to improve your ads. It is represented by a percentage and the higher it is, the better your ads are. You should be always aware of this indicator as it tells Google how good or bad your ads are.
You can find this information in the “Recommendations” tab in Google Ads.
The next important KPI of your ads is CTR (click-through rate) and it tells you how many people clicked on your ad after seeing it. This may tell you a lot about the quality of your copywriting because it doesn’t reflect any on-page factor, only the ad factor itself.
The very last thing we are going to cover about the tracking of your performance is conversions. You will see them in the “Campaign” tab in the “Conversions” column. You can check out how to work with conversions settings here.


