Google has come up with a number of automated solutions in recent years. If you previously wanted to manage your Shopping campaigns, you couldn’t avoid the time-consuming and demanding prioritization of campaigns, product groups, bids, or keywords. Thanks to Smart Shopping campaigns, you will no longer need to do any of this.
What is the difference between standard Shopping and Smart Shopping campaigns?
- Automation and data.
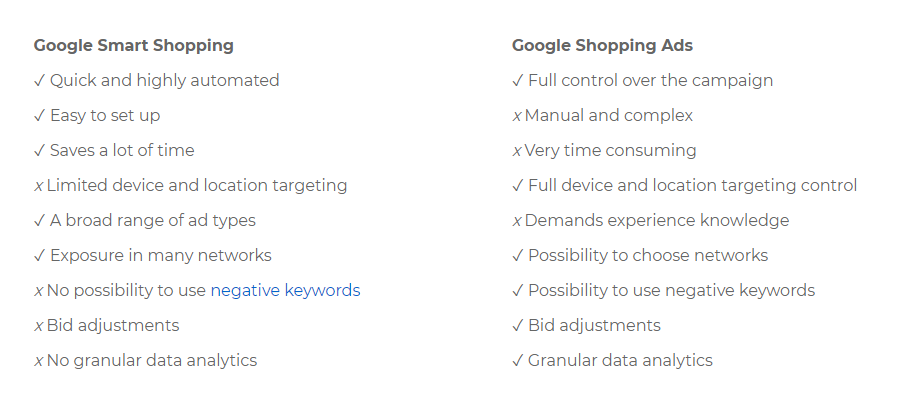
The real differences between them are almost exclusively automation and data. Here is a brief overview of the most important pros and cons of Smart Shopping Ads and Google Shopping Ads. It should help you decide if Smart Shopping is for you.
Smart Shopping campaigns may not be the best choice if:
- ads are for new customers
- you are doing remarketing or trying to capture new buyers
- collecting search term data is important to you
- you have terms you don’t want to advertise on (negative keywords)
- you want to be in control of who you advertise your product with
Google is giving advertisers more and more access to machine learning – which doesn’t necessarily mean better results, but it can help us spend less time managing our account and more likely better results.
How to Start Google Shopping Smart Campaigns
1. Create a Google Ads account
This is your first step. You need to create Google Ads account if you want to create campaigns. Google Ads is a system for online advertising of products and services on Google. Before you start, you need to have Gmail account. If you don’t, just register here.
1. On the Google Ads page, click the blue “Start now” button. As we said before, you need to have a Gmail account. So if you have one, log in or create a new one.
5. Once you confirm your business information – time zone, country, and currency – you’ll find yourself in your own Google Ads account. From here you will create advertising campaigns for your services and products. Before that, however, you need to set up basic settings to make these ad campaigns work. You can find them at the top in the “Tools” section. If you want to set up your campaign and you know how, just fill all required information like name, budget, goal etc.
This is how fast we’ve been able to create and set up a Google Ads account quickly, and you’re just a step from creating your first advertising campaign for your services and products. However, for better efficiency, you must first create an account in Google Analytics.
2. Create Google Analytics account
Online advertising of your products and services is without a doubt the best way to bring them as close as possible to your potential customers. In order to create good ads, you need to know what people visit your site and how they behave. Once you created Google Ads account, it’s time for Google Analytics account.
1. You can sign in to Google Analytics with your Google (Gmail) account or create a new one with a different email address. It should match the one you used in Google Ads.
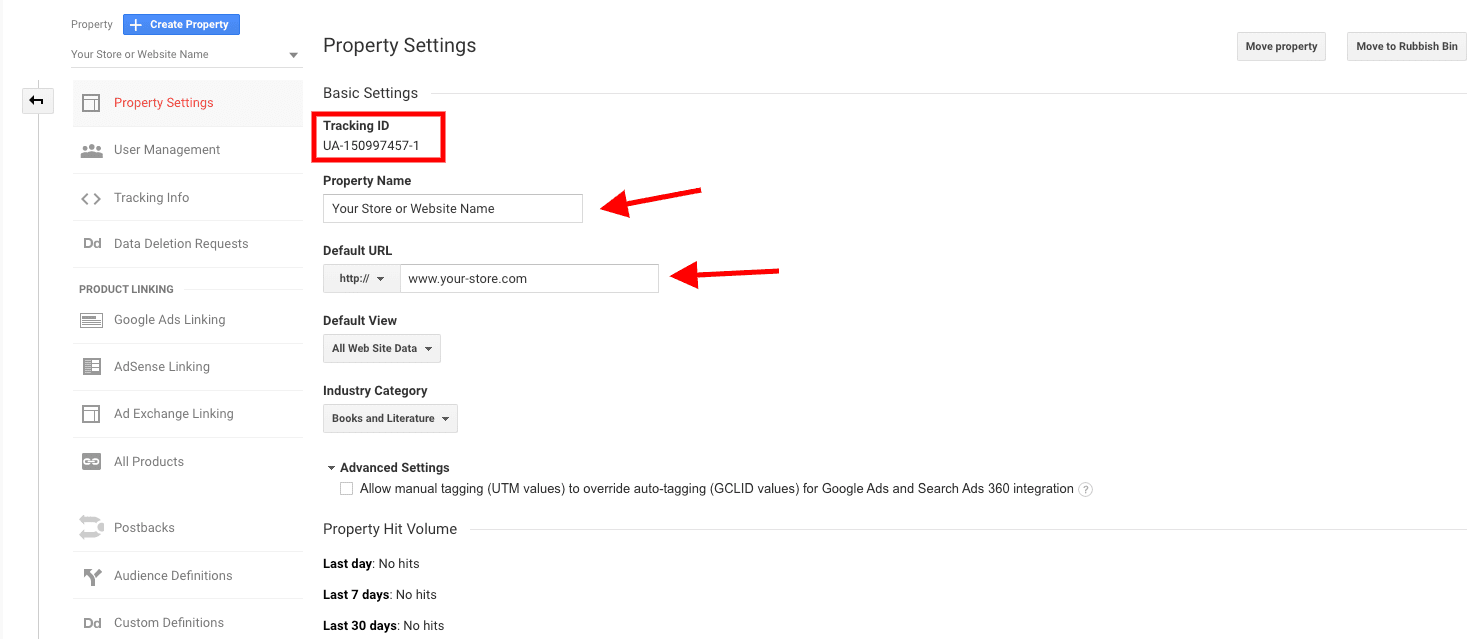
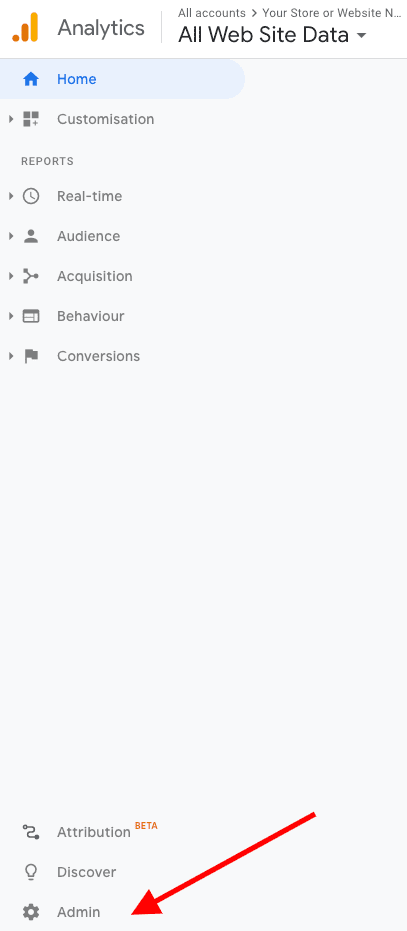
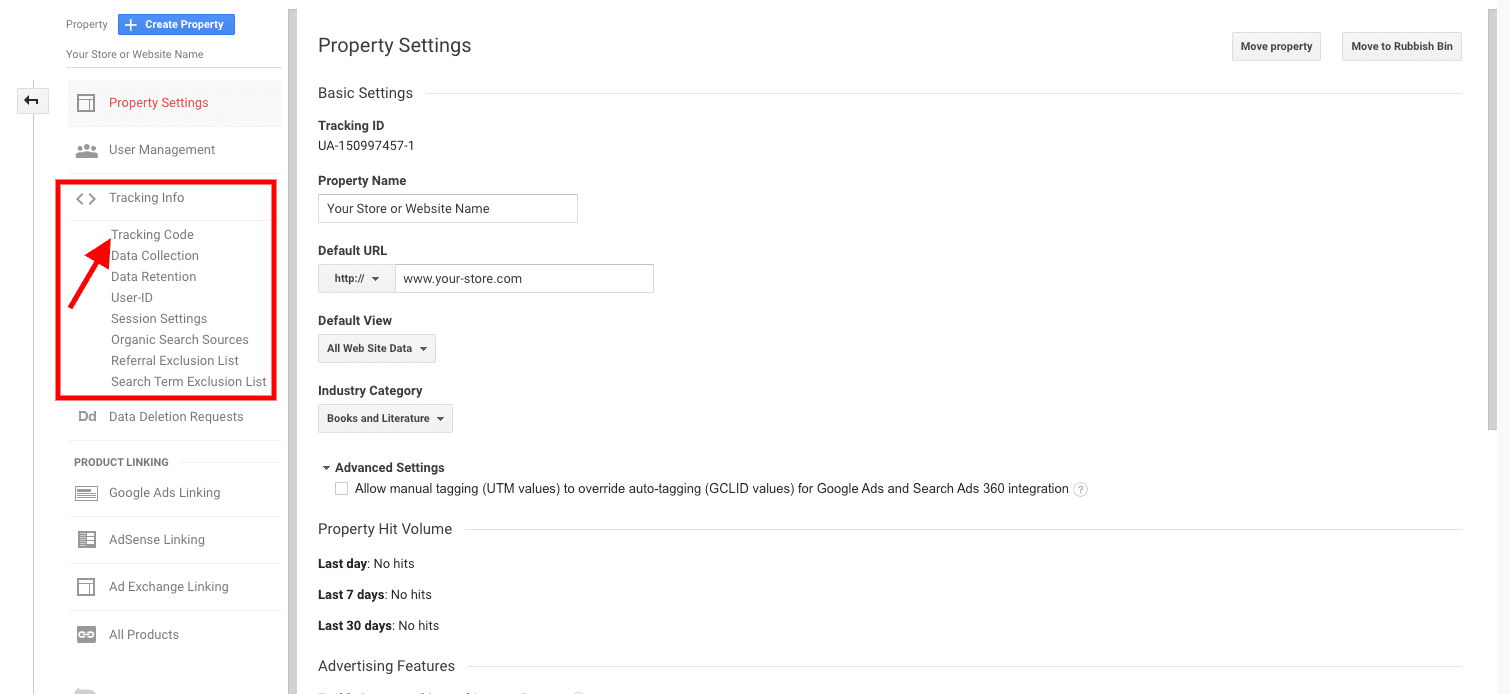
2. Once you create your account, you’ll need to set up property first. This means adding a web address where you offer your services or products. You will do this in the “Admin” section.
4. Once you in the settings, fill all the required information like “Property name” and “URL“. Based on your property, you get your tracking ID that is specific to each site. This code is then required to be added to your website to collect data to create reports from. You can find detailed instructions on how to do this directly in Analytics Help.
5. Another basic step before you start using the service is to set up reporting views. Views allow you to create exactly the reports you need. You can set many of them as you want to and customize them to show specific data relevant for you. One such setting is, for example, filtering your IP address to avoid it in statistics. We suppose you don’t want your activity to be included in the overall report.
Like Google Ads, you can share your Google Analytics account with others without giving you’re your password. You can also find user management in the “Admin” section. You invite them via email addresses and manage their account competences.
Google Analytics is also an app, that you can download to keep your reports under the thumb. You can also be informed about the activity via email. Just set your own alerts in the “Admin” section.
For advanced Google Analytics settings (especially report views), we’ve created a short guide to all the features you can use in the service:
3. Link your Google Ads and Google Analytics accounts
A comprehensive overview of the performance of your ads and visitor activity on your site may sound like a necessary but time-consuming task. However, you only need a few clicks to link the created Google accounts and they will take care of the statistics for you.
4. Create a Google Merchant account
Once you have created accounts in Google Ads and Google Analytics, you need to organize the products you offer in your e-shop somehow. Here, the Google Merchant Center offers a helping hand by collecting product data that you will then advertise.
Keep in mind that you need to have SSL certificate (https://) on your e-shops, websites to run Merchant Account and Shopping Ads.
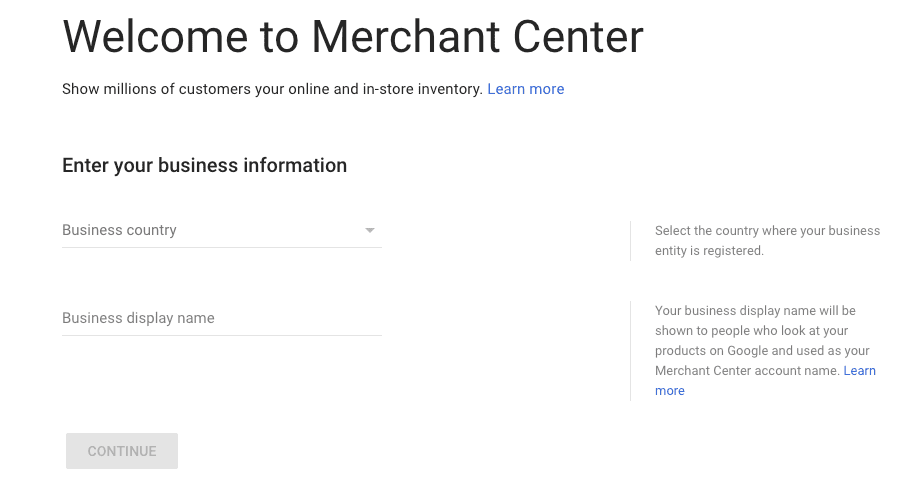
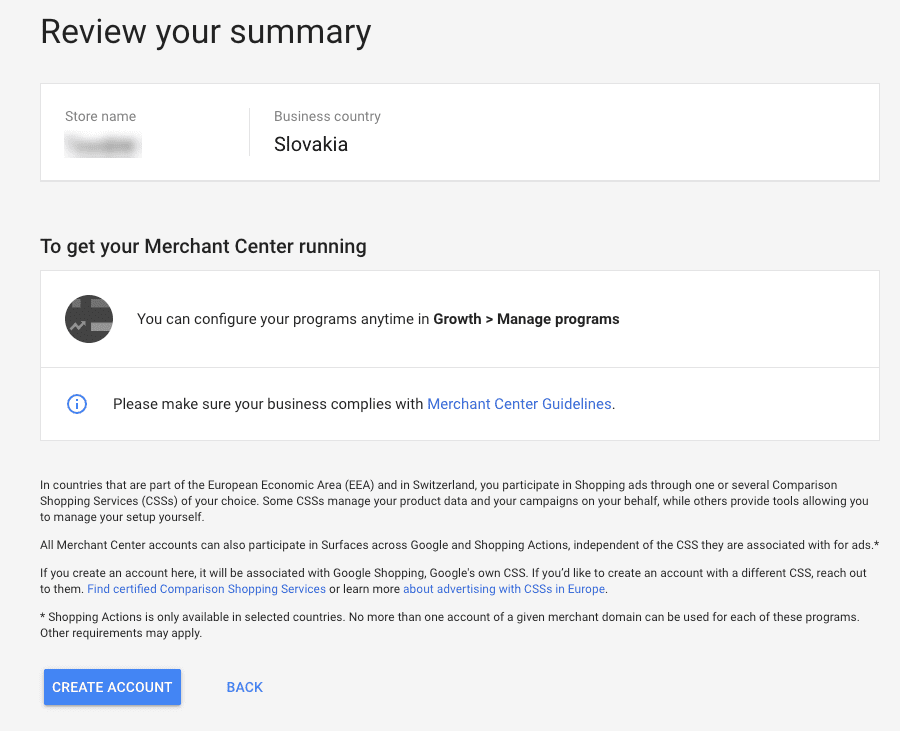
1. Sign in to the Google Merchant Account. The next thing you need to do is to fill all the information.
5. You will then be taken to your account where you have your own Merchant ID. In the “Business information” section of the menu, complete the required information about your business. In addition to classic data, you can also upload a logo or colors that represent your business and can be used for advertising.
6. In order to upload information about your products, you must have a verified e-shop web address. In this way, Google verifies whether you are the actual owner of the address. To learn how to verify your web address and what to do if you own more addresses, see this link.
The advantage of using BlueWinston with Google Merchant Center
BlueWinston brings you a unique opportunity to transform your common XML product data feed that you are using for the creation of ads, price comparisons or Facebook, for the purposes of Google Merchant feed. These products and information will be automatically updated every 6 hours.
In addition to “storing” products, the Google Merchant Center also offers a helping hand to improve your advertising results. In the “Opportunities” tab in the left menu, you’ll find recommendations on how to change your product or campaign data to make your ads more effective.
5. Link your Google Merchant and Google Ads accounts
The Google Merchant Center collects information about the products you offer in your e-shop. You can then use this data to create advertising, especially remarketing campaigns. Therefore, you need to link it with Google Ads.
To link your accounts, you need to use a single Google (Gmail) account for both your services accounts.
1. Log in to your Google Merchant Center account.
2. In the settings menu, click on “Linked accounts“.
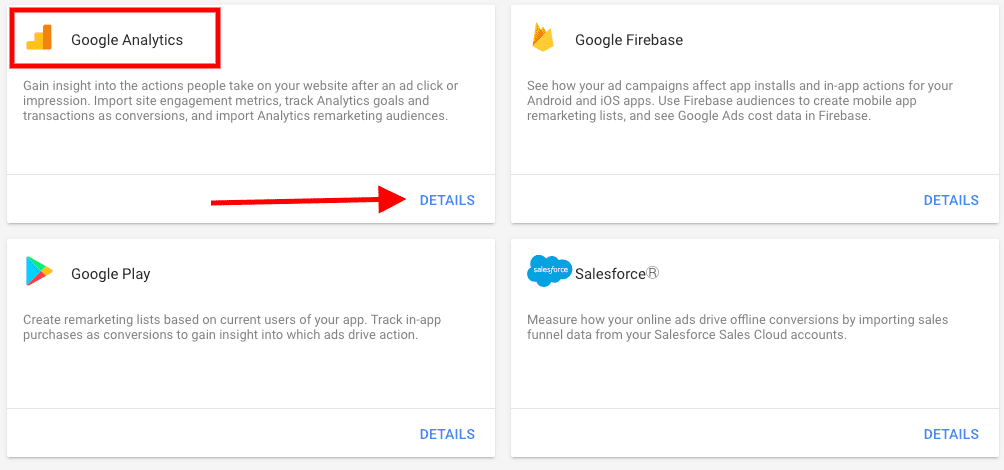
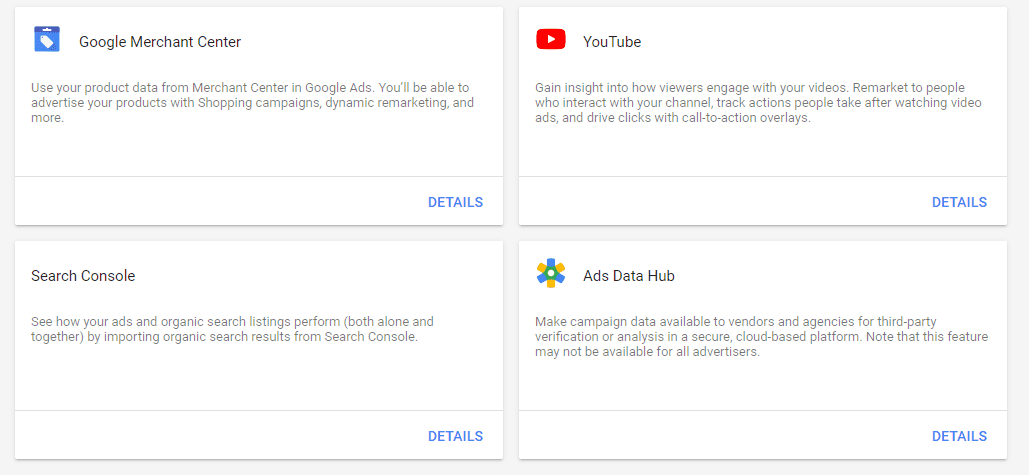
4. Your request has been sent. Now log in to your Google Ads account and simply accept this request. You will do that by clicking at the “Tools & Settings > Linked accounts” then scroll down and click on the Google Merchant Center account – Details. After that you will find this request and you simply accept it.
6. Google Analytics transaction pixel for your website (ecommerce tracking)
The first thing you need is a Global Site tag. We will show you where to find it.
1. Open your Google Analytics account.
2. On the left menu, click on “Admin“.
7. Enable Google Analytics Ecommerce Tracking
If you have an online store, you can’t just depend upon the analytics reports provided by your shopping cart. You need to set up Google Analytics eCommerce tracking to get better reports. By using Google Analytics eCommerce tracking , you can correlate sales data with website usage data. For example, You can see product and transaction information, average order value, eCommerce conversion rate, time to purchase, and other data.
1. Open your Google Analytics account.
2. On the left menu, click on “Admin“.
8. If you want better results, install code for Dynamic Remarketing
The dynamic remarketing event snippet collects data, such as the IDs of the products or services that people viewed on your website and the total value of items. Google Ads uses this data to show customized ads to your website visitors, and remind them about their visit to your site.
1. Sign in to your Google Ads account.
2. Click the tools icon in the top right corner of your screen. Then click on “Audience Manager” under Shared Library.
3. From the page menu on the left click Audience sources.
4. In the Google Ads tag card, click Set up tag. If you already set up a Google Ads tag, you can edit the tag by clicking the 3-dot menu and then Edit.
5. Select “Collect data on specific actions people performed on your website to show personalized ads” and choose your business type.
9. BlueWinston Registration
BlueWinston.com is an automated tool for the creation of product text ads for Google Search. If you want to know more, read Feed-driven product campaigns.
We will show you how to sign up for 30 days trial.
1. Click on the registration button at BlueWinston.
2. Fill all the information. After that click on “Next“.
10. Connect Google Merchant Center account to the BlueWinston
If you want to create feeds for your e-shop you need to connect your Google Merchant account with BlueWinston account.
1. Once you log in to the BlueWinston, look at the left menu. Choose “Feeds” section. Then select “Google Merchant feeds“.
11. Create product XML feed URL
If you want to continue, you need to have your own XML feed URL for your e-shop. If you don’t know how, ask your developers. Without this URL you can’t proceed to the creation of Smart Shopping campaign.
If you are using Magento or Shopify, you can use our BlueWinston plugin. You will have everything ready just with one click.
Check out our article if you want to know how to set up a product name and a correct XML feed.
12. Create Google Merchant feed in BlueWinston
1. Open your BlueWinston account.
2. On the left menu click on Feeds > Google Merchant feeds. Then you will find “Create new” button and choose “Google Merchant feed“.
3. Now you need to fill in all the information.
Name -> Name the shopping ads feed, so you can recognize it in your Google Merchant account.
XML file URL -> You need to paste your XML URL here.
Channel -> Choose Online.
Target country -> Is a country where you want to show your ads.
Content language -> Language of your e-shop.
Click on “Save & Continue” button.
7. Now it’s up to you if you want to use Google Product Category Taxonomy. You have two options, first to skip assignment to Google Categories. Then click on “Save & Continue” button.
8. The second option is from a tag or assign a category to tag values. Under “Google category” just click on assign and choose the right category. Then click on “Save & Continue” button.
13. Create Smart Shopping campaign in BlueWinston
After you are finished with your Google Merchant feed, BlueWinston need to update it. After that (it can take a couple of minutes) you can create your first Smart Shopping campaign.
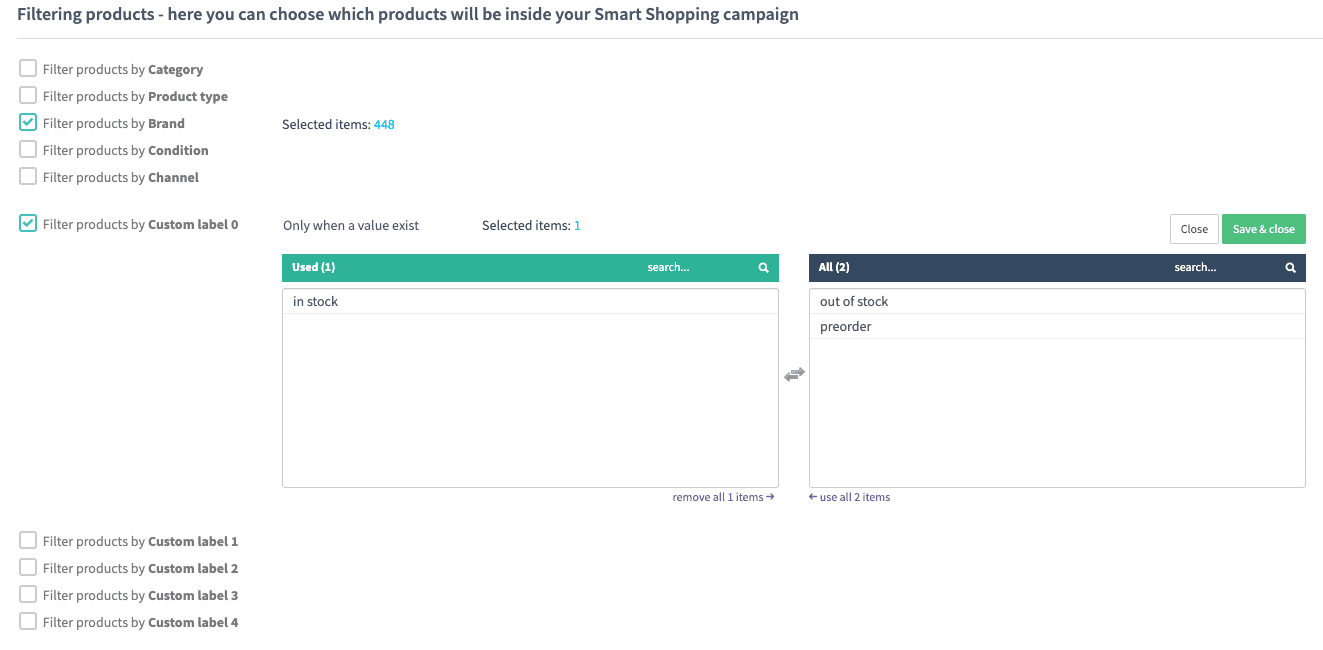
1. In the BlueWinston menu, click on the Campaigns > Campaign list. Then click on the “Create new” button and choose “Smart Shopping ads“.
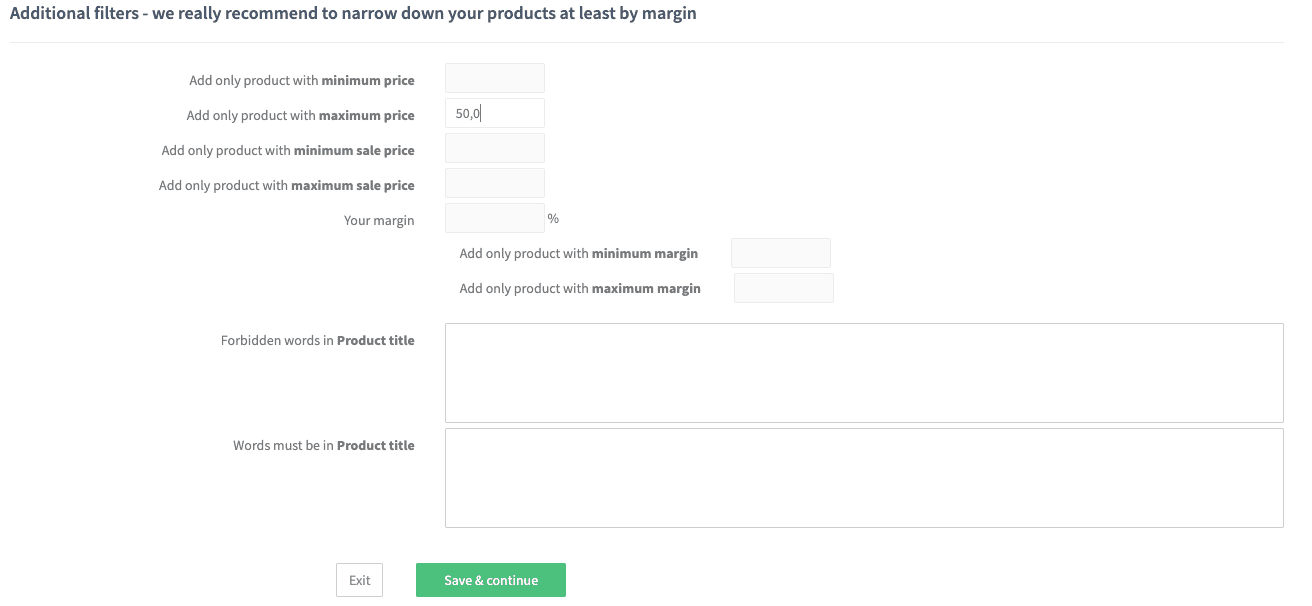
At the end of this step, you can set up minimum price, maximum price, minimum sale price, maximum sale price and your margin. Also you can add forbidden words in product titles and words that must be in the product title.
5. Click on the “Save & Continue” button to finish your first Smart Shopping campaign.
14. Optional – How to create Product Text campaigns in BlueWinston
These ads can appear on Google results pages and across the Google Network, which includes the Search Network, search partners, and the Display Network. Text ads might look different on the Display Network, or on mobile. If you want to know more about them, read our article about Google Product Text Ads from XML data feed.
Now we will show you, how can you easily create Product Text ads through our tool. 1. In the BlueWinston menu, click on the Campaigns > Campaign list. Then click on the “Create new” button and choose “Product text ads“.
If you followed this guide, you should be able to create new Smart Shopping campaigns anytime ! If you have any questions about our tool, don’t hesitate to contact us.
 Experience Microsoft Product Ads for
  free until January 1, 2026 - absolutely no cost!


